Need some help to use our AcyMailing plugin? Here is the ultimate guide to use AcyMailing on WordPress. AcyMailing is one of the best newsletter plugin for WordPress, it allows you to create, manage and send easily your newsletters from WordPress.
This guide explains the steps and main features of AcyMailing.
Step 1: Install our WordPress newsletter plugin: AcyMailing
First you need to download AcyMailing. You can download the plugin in two ways:
Free version
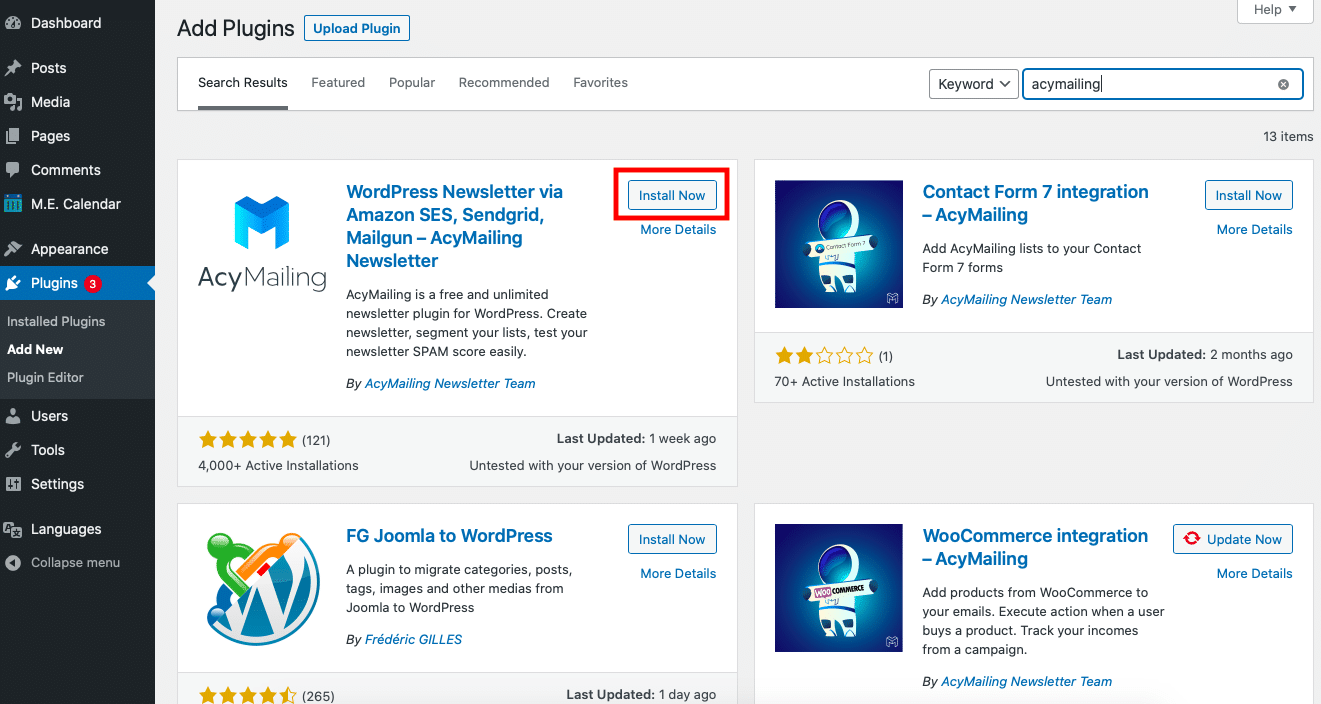
To download AcyMailing with a free license, follow these steps:
- Log in to your website’s administrator account.
- In the “Plugin” section, click on “Add a plugin”.
- Search for AcyMailing in the search bar.
- Then download it and activate it.
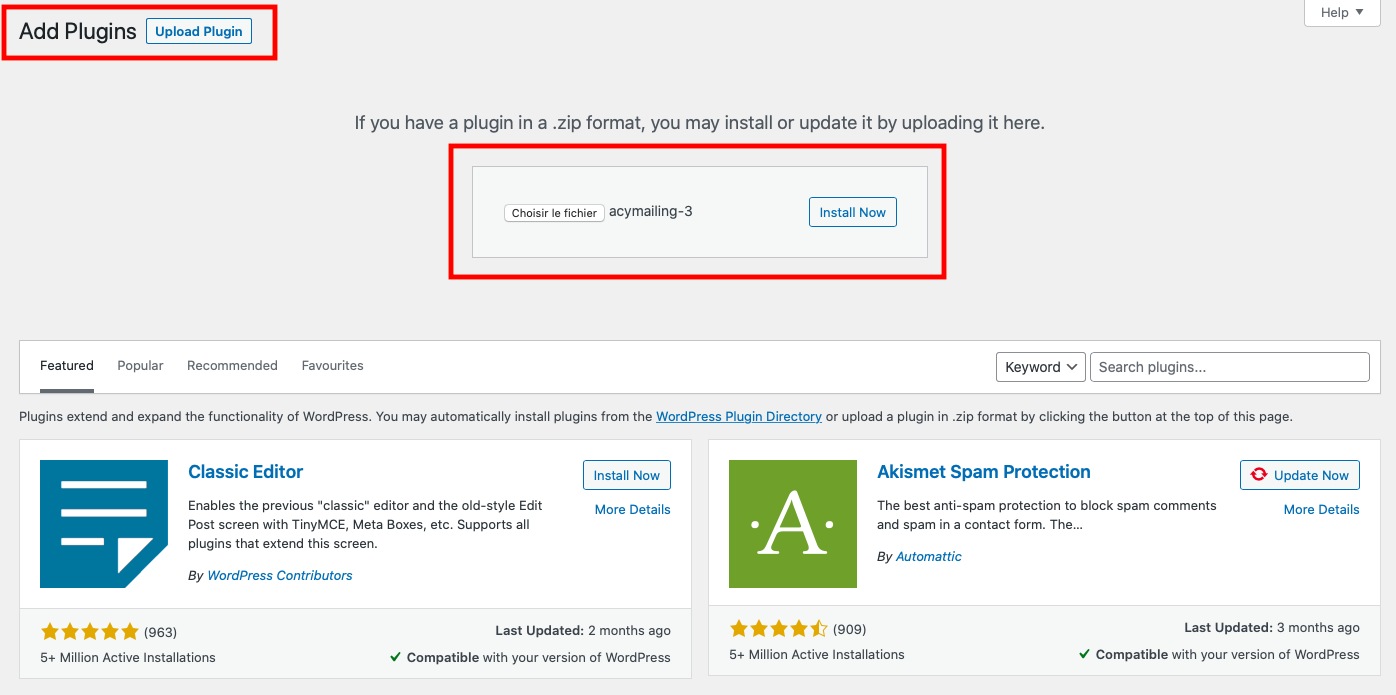
On our website, you can also download the file (by clicking “Download” or on the “Pricing” page). Then you can go to the “Extensions” section and “Add extensions”. Select “Upload an extension”. Drag and drop your ZIP file, install the plugin, and activate it.
Paid version
To download AcyMailing as a paid license, go to the AcyMailing website.
First, choose the license you want to pay for (“Pricing” page) and proceed with the payment. Once this is done, follow the next steps:
- Download the ZIP file.
- Go to “Extensions” and click on “Add.
- Upload your plugin in the corresponding section.
- Download and activate AcyMailing
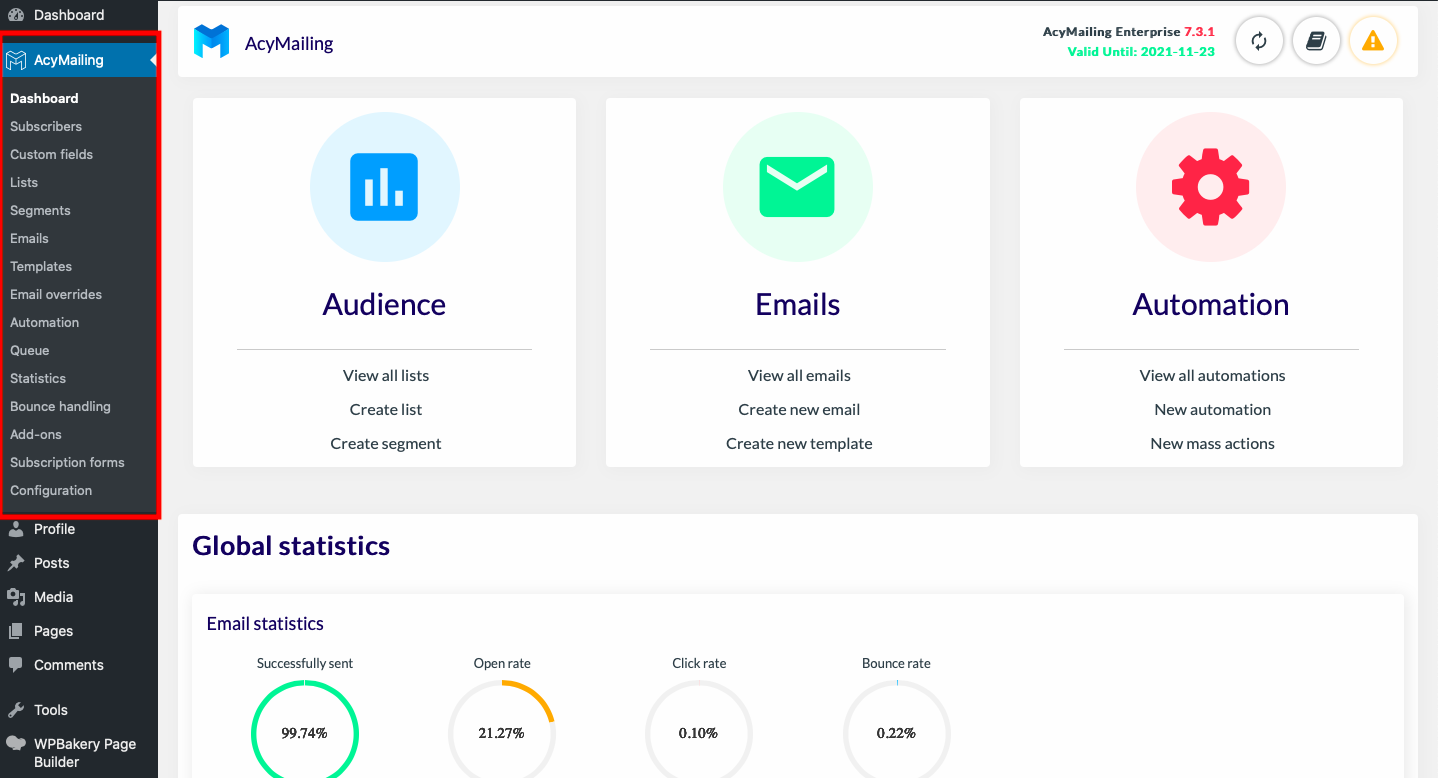
Your plugin is now successfully downloaded. You can now access all the features of AcyMailing in the left menu of WordPress.
Step 2: Set up AcyMailing to send your first WordPress Newsletter
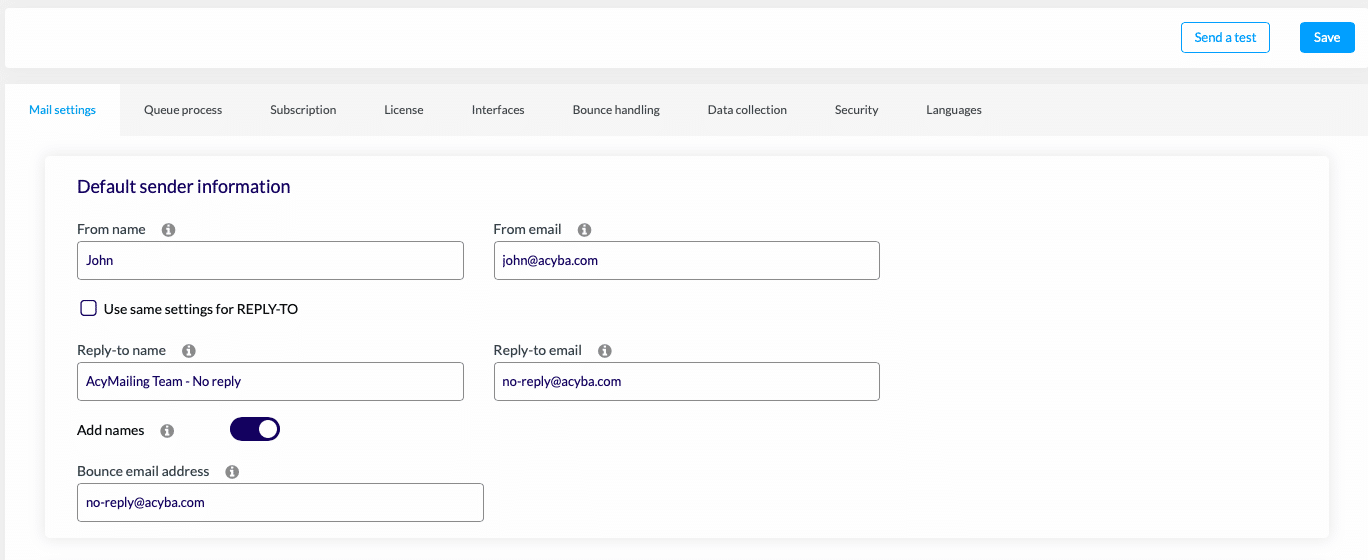
Before you start using AcyMailing, it is necessary to set up the settings for sending your newsletters. Go to your “Configuration” section and then to “Mail settings”.
First, fill in the sender’s information:
- Sender’s name (From name)
- Sender’s email (From email)
- Reply-to (name, address)
- Bounce email address
Then, choose your sending method. Several external sending services are available:
- Amazon SES,
- Sendinblue,
- Mailgun,
- SendGrid
- SMTP…
These external sending services allow for a better deliverability of your e-mails. In other words, your e-mails are less likely to be considered as SPAM.
Here is an exhaustive list of the different sending methods available.
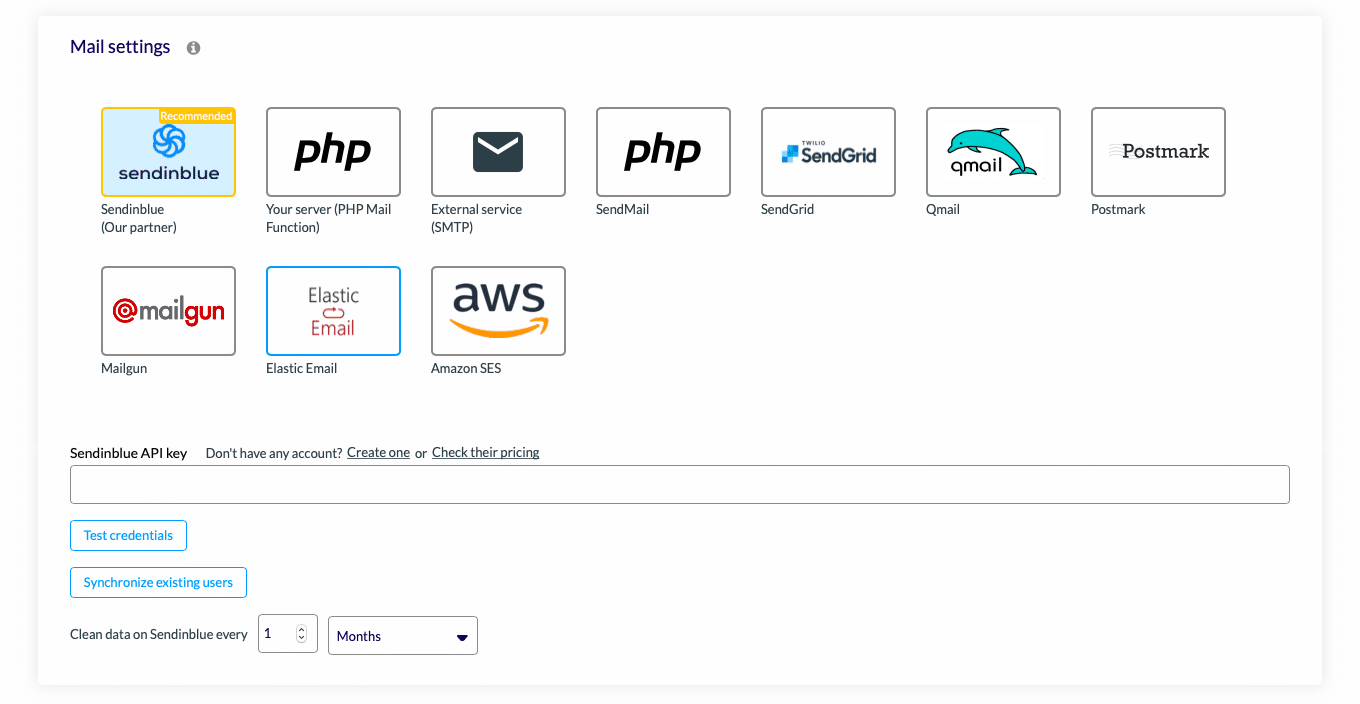
Several tools can help you to get started with the installation and configuration of these sending methods: Mailgun for WordPress, Sendinblue for WordPress, Amazon SES.
To configure these services, the following information is usually required:
- API key,
- First and last name,
- Server
- Port….
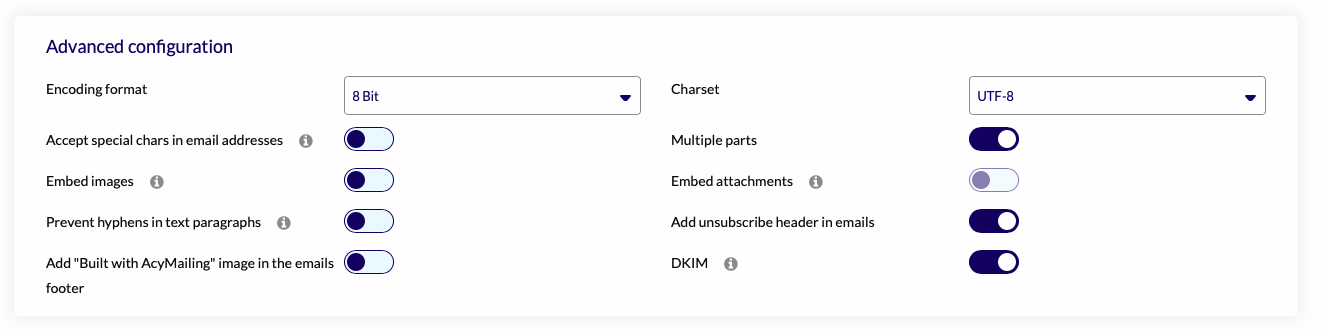
Once your method is set, you can modify or choose to add advanced parameters to your newsletters (special characters, integrated images…). By default, some of them are activated.
Paid version:
If you have a paid version, you will have to add your license key in “Configuration”. It allows you to access AcyMailing’s paid features such as automatic sending, scheduled sending, and bounce. For this, go to “License“. If you don’t know your license key, click on “Get my license key”.
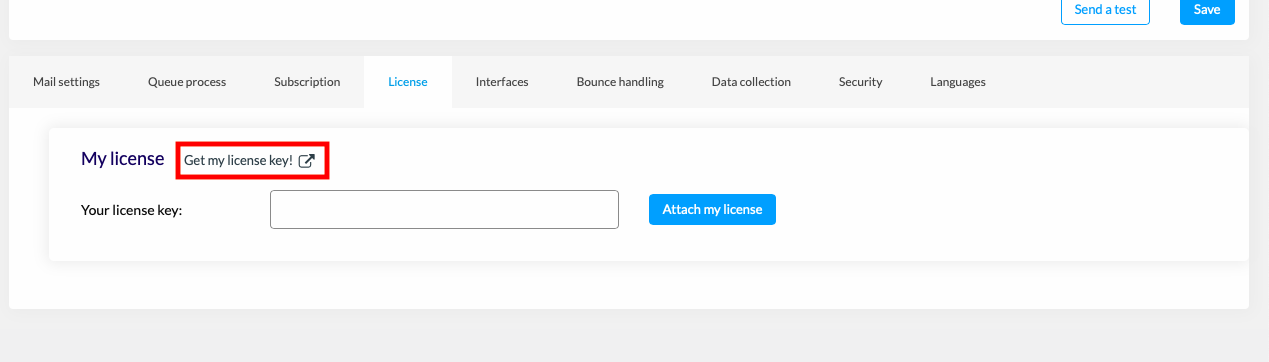
You will be redirected to your AcyMailing account to get your key. You just have to copy and paste it in the dedicated space in AcyMailing (‘Configuration’). After activating the Cron, you will be able to set up automated tasks.

Your plugin configuration is now complete. You can create your first subscription list.
Step 3: Create a newsletter list
Go to “Lists” to create your first list. You will see all your lists. Lists can be created, sorted, and categorized. By default, the “Newsletter” list is created. Your first list can be created either from the existing list or by creating a new one (click “Create”).
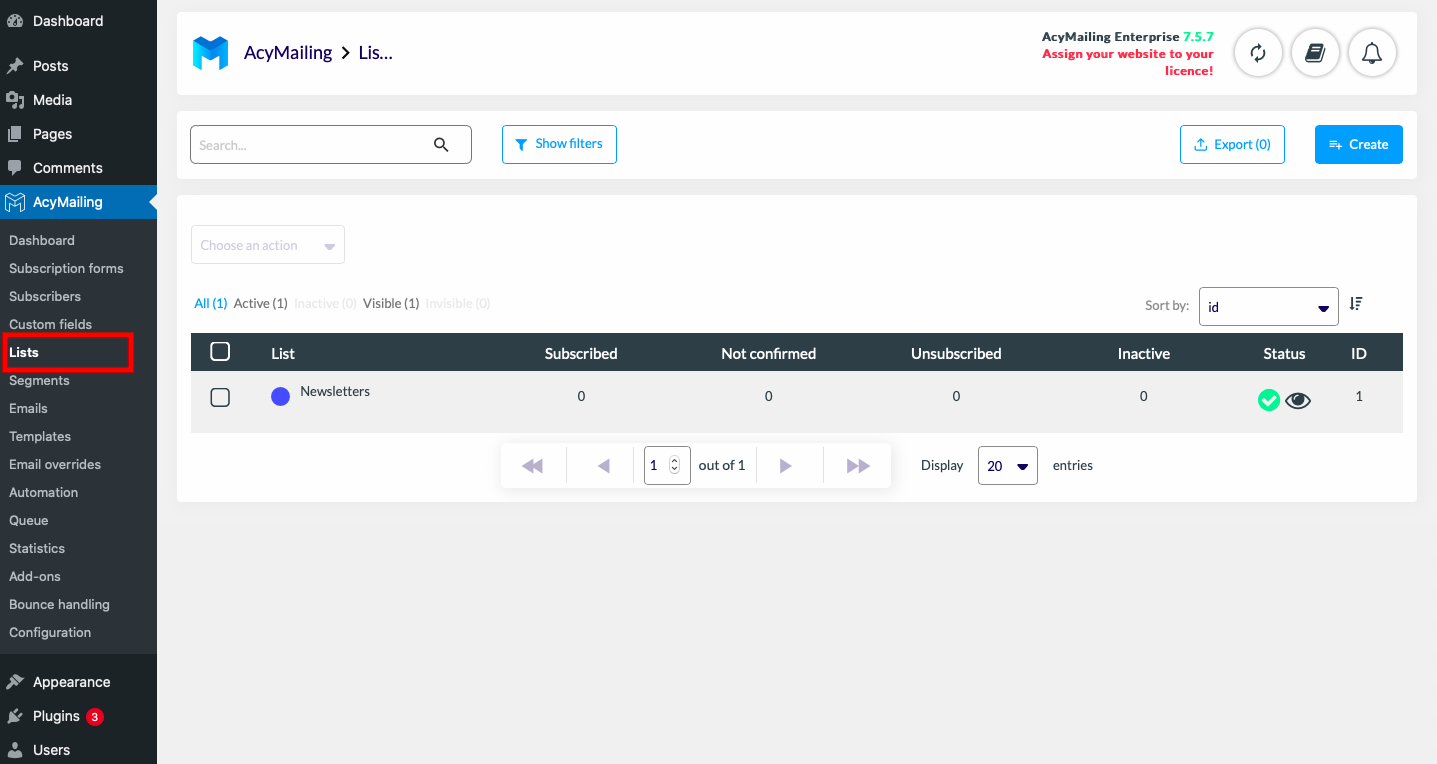
If you create a new list, name it and save it. Then go to one of your lists.
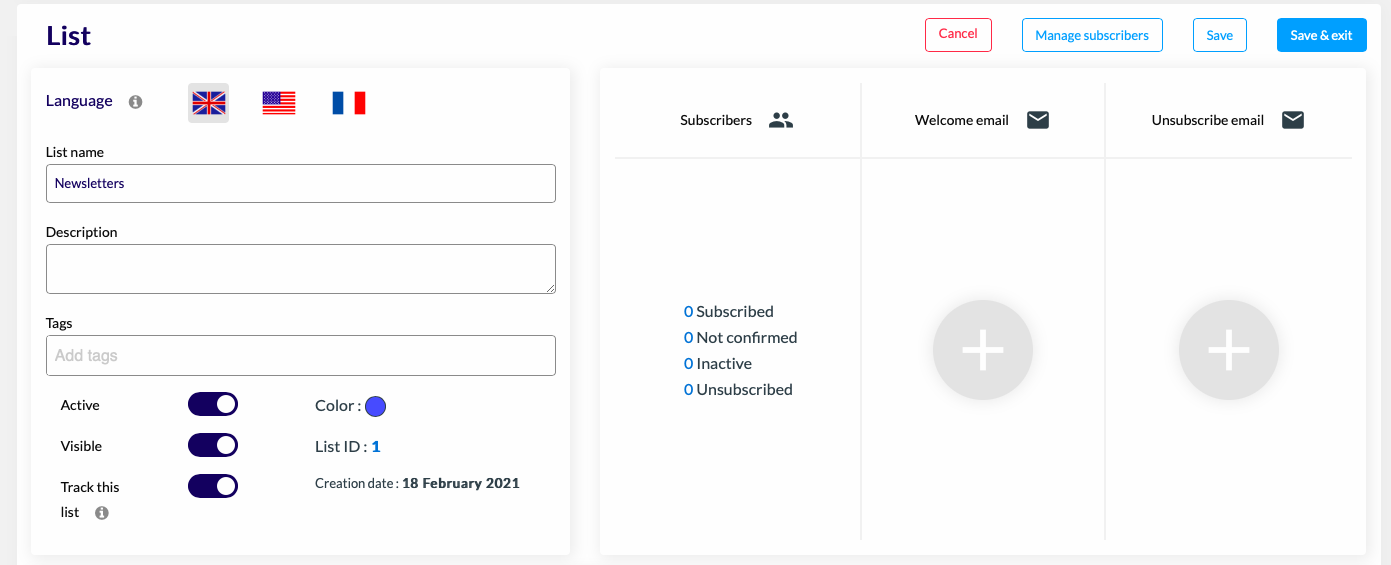
Once in your list, you can add, manage or export your subscribers. Choose the language, description and labels. For each list, you can write a welcome and unsubscribe email. To access this feature, click on the +.
As soon as you have sent your first newsletters, you will be able to consult the results of your campaigns (click rate, failure, bounces, etc.).
Want to acquire new subscribers? Let’s see how to create a subscription form on your WordPress website (by using a popup on WordPress for example).
Step 4: The WordPress newsletter subscription form
The subscription form allows you to acquire new subscribers. Your subscribers will be able to subscribe to your newsletter via the subscription form to join your lists.
To create a subscription form, go to the “Subscription forms” section and click on “Create”. You will then have to choose the type of form you want on your website. If you have a free license, you will only have access to the widget and the short code.
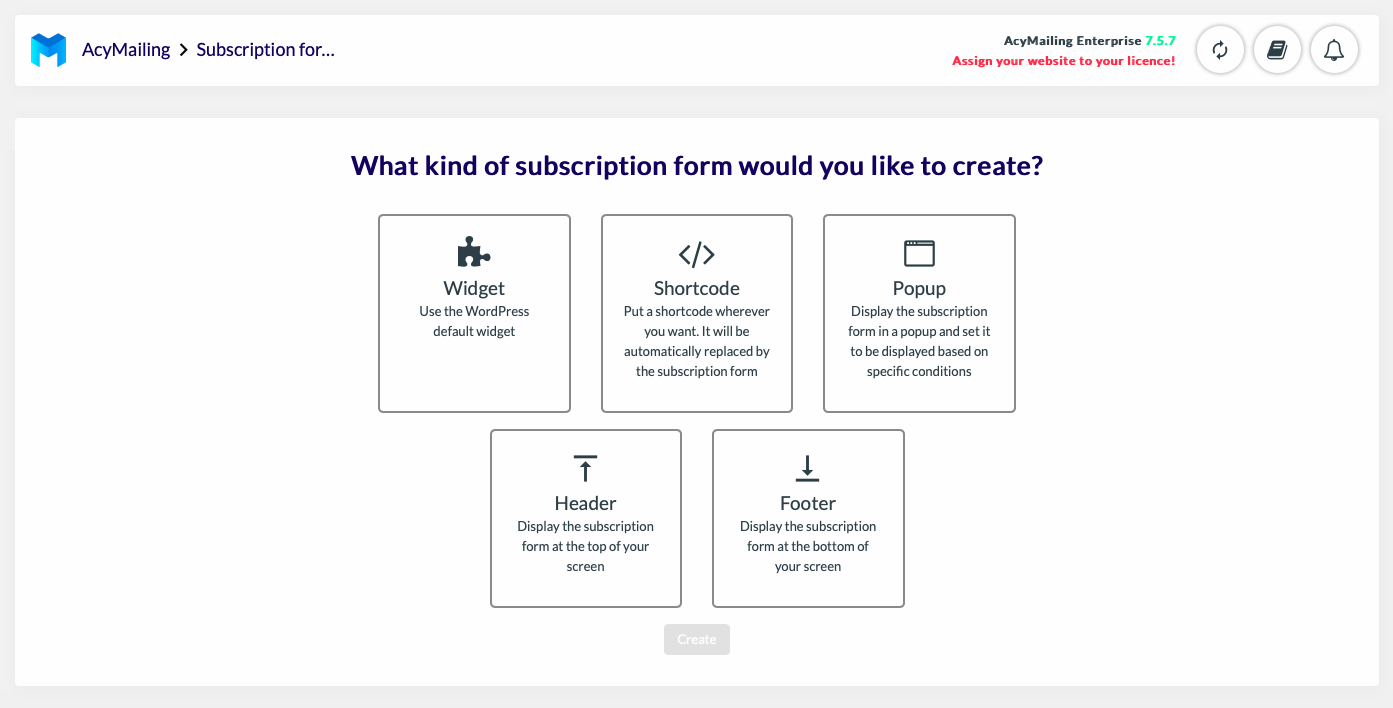
AcyMailing allows you to integrate different types of forms to your website:
- Widget: WordPress default widget.

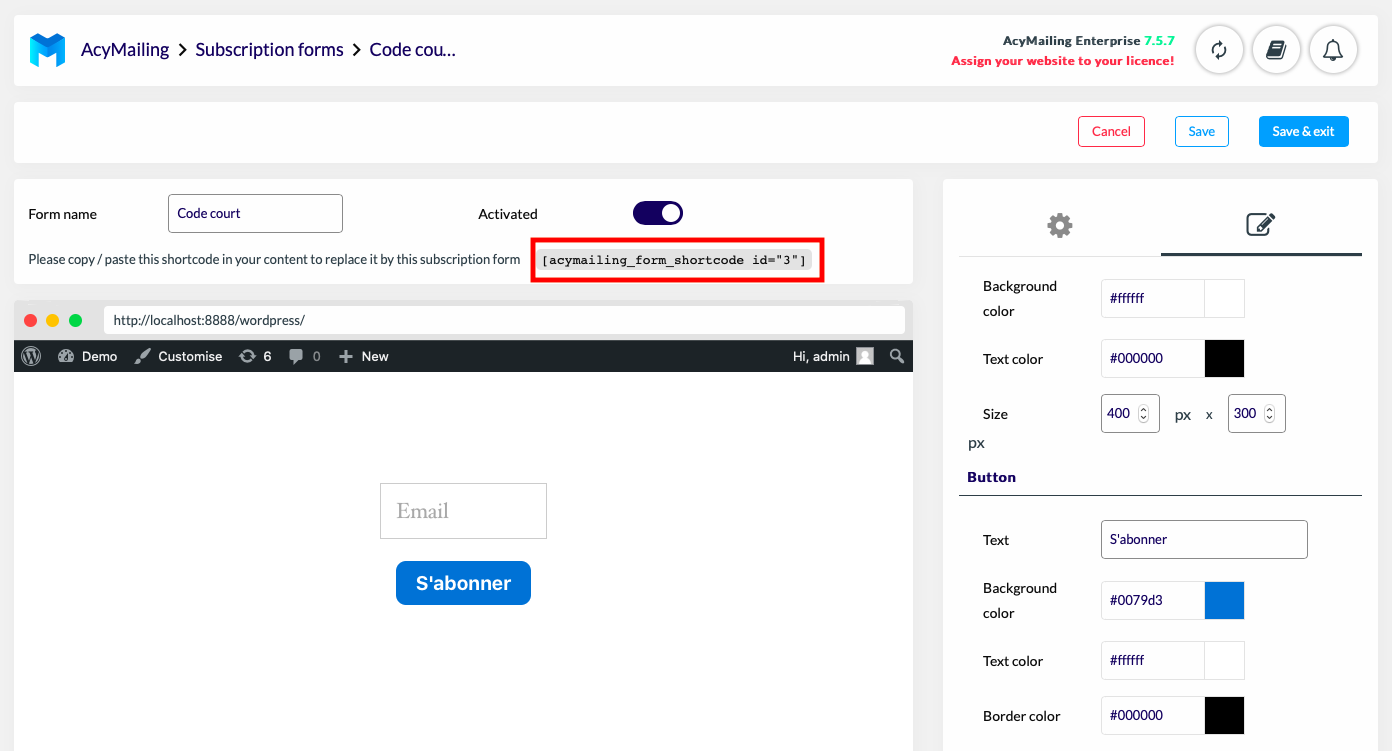
- Short code: a code that converts into a subscription form. You can place it wherever you want on your website.
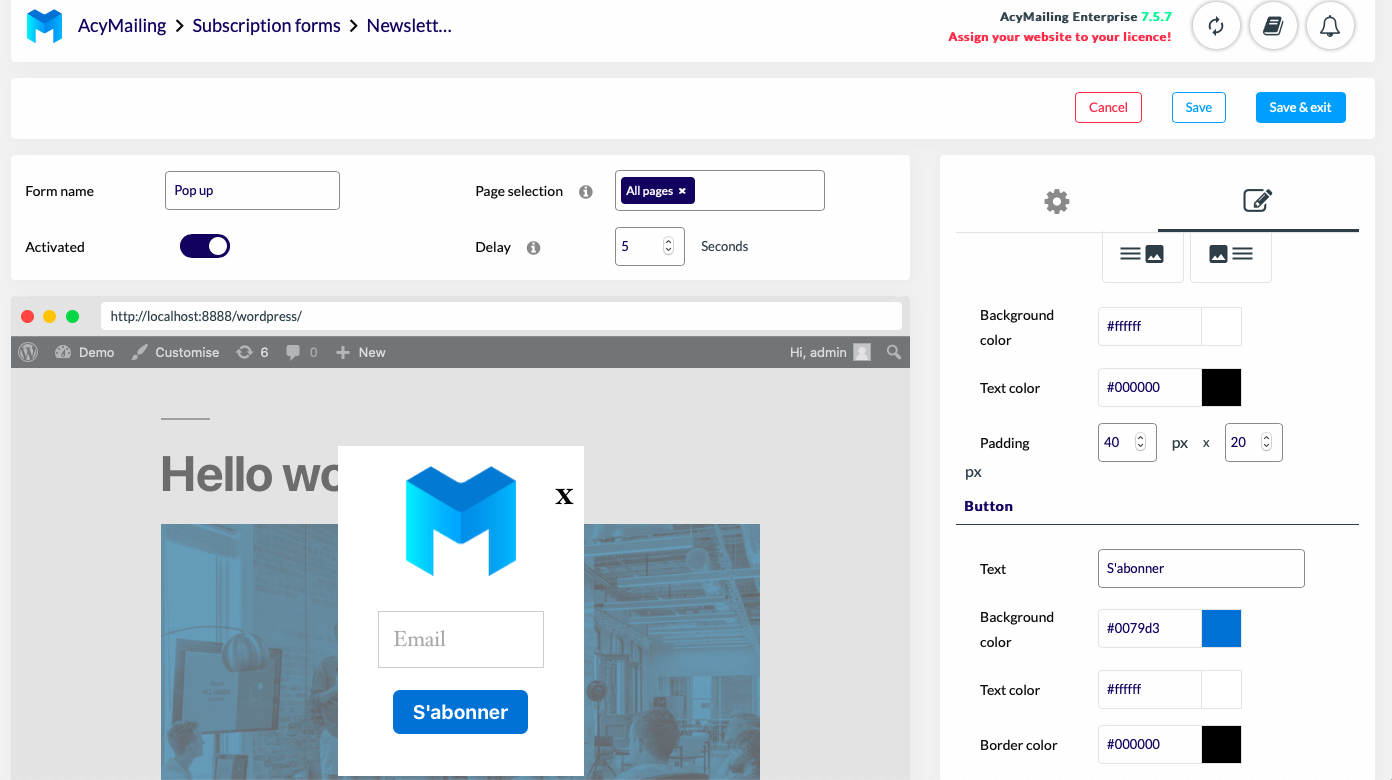
- Pop-up: a pop-up window that appears in the middle of your page.
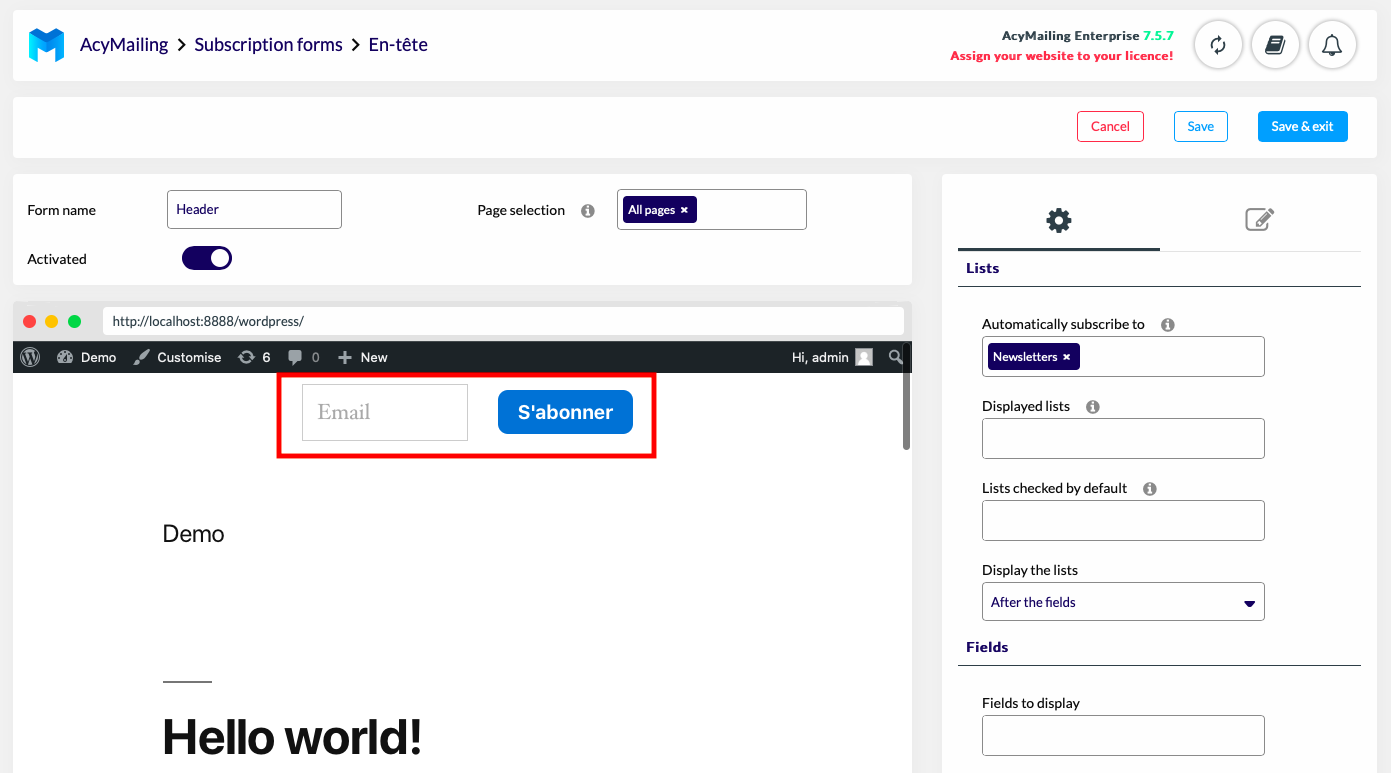
- Header: subscription form that appears at the top of the screen.
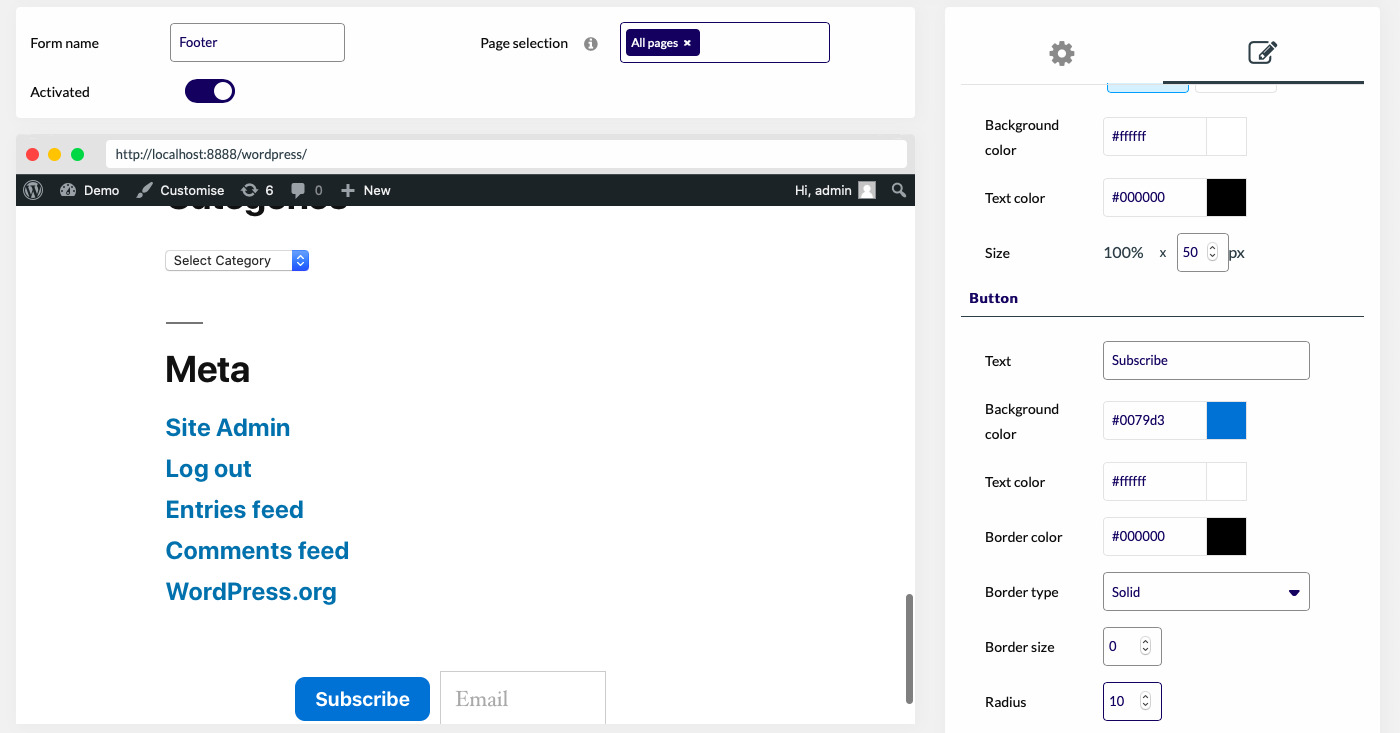
- Footer: subscription form displayed at the bottom of the screen.
You can display or set up the following elements in your forms:
- Subscription lists
- Custom fields
- Articles
- Cookies
- Redirections
The editing mode allows you to preview your future form on your website. The forms are customizable.
For example, you can:
- Change the layout and text of your forms
- Change the colour and appearance of the button
- Add images (pop-up)
You can now create a subscription form on your website.
Step 5: Manage your subscribers
Do you have too many subscribers to manage? We will help you to understand and manage your list of subscribers. To do this, go to “Subscribers”.
“Subscribers” gives you access to your complete subscribers list. If a subscriber registers via the subscription form, he/she will automatically be added to this list. It is also possible to add or import new subscribers.
Several actions are possible: activate them, deactivate them (first circle) or delete them (drop-down menu “Choose an action”). The registration status appears for each subscriber (second circle). If your subscriber has confirmed his registration, a green circle will appear in “Status”. If your subscriber has not confirmed his registration, a red circle will appear.
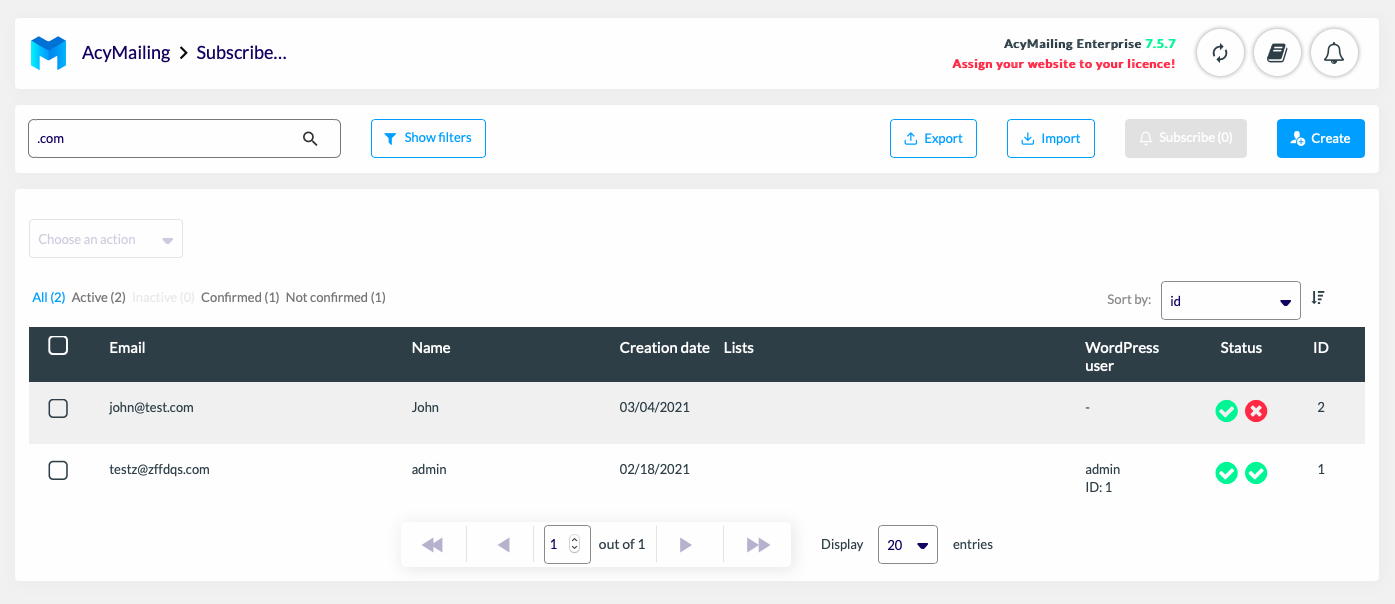
You can also search for a specific type of subscribers with the “Filter” option. For example, you can search for all subscribers of X company.
Finally, all your subscribers can be exported to another database (“Export”).
Selecting one of your subscribers will give you access to all the subscriber’s personal information: name, email, language, birthday, etc. This information can be completed or modified at any time. Subscription lists, opening rates, and average click rates are also displayed.
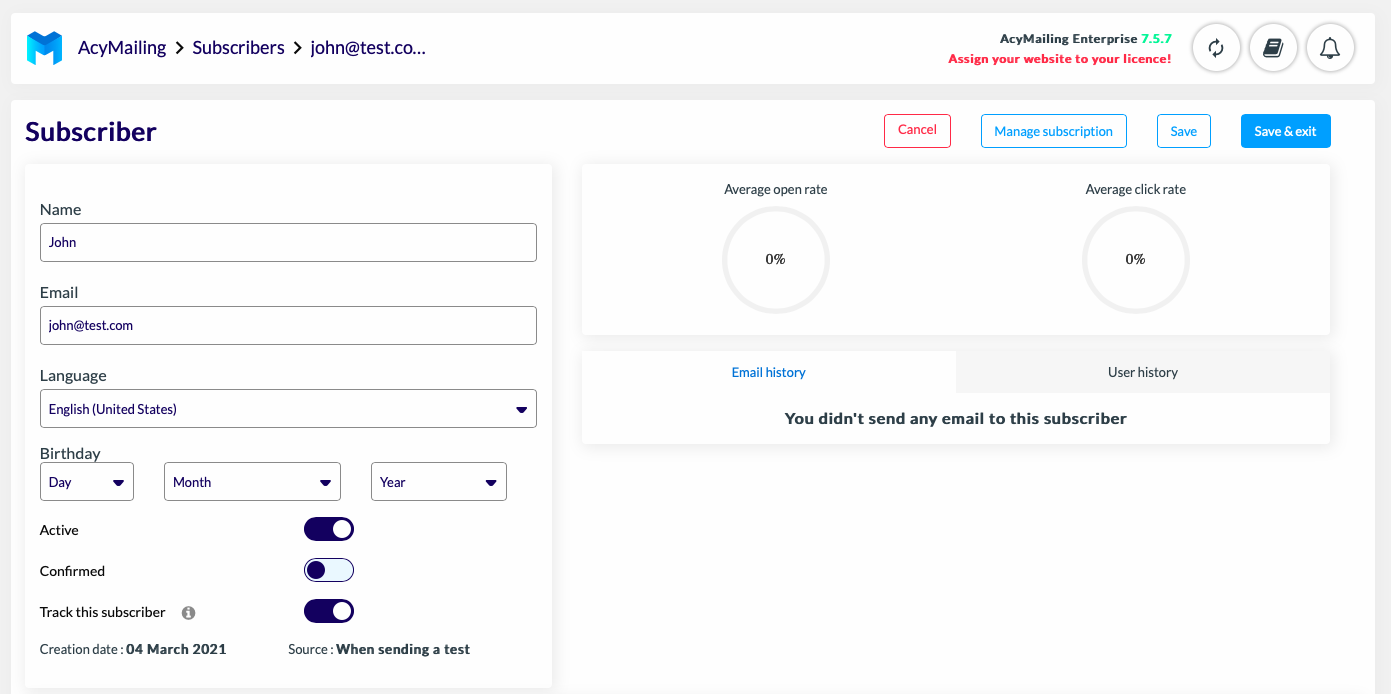
You can also manage the user’s subscription or view the history of received emails.
Step 6: Create a WordPress newsletter using AcyMailing
You are now ready to create your first newsletter. To create a newsletter, go to “Emails” and click on “Create a new email”.
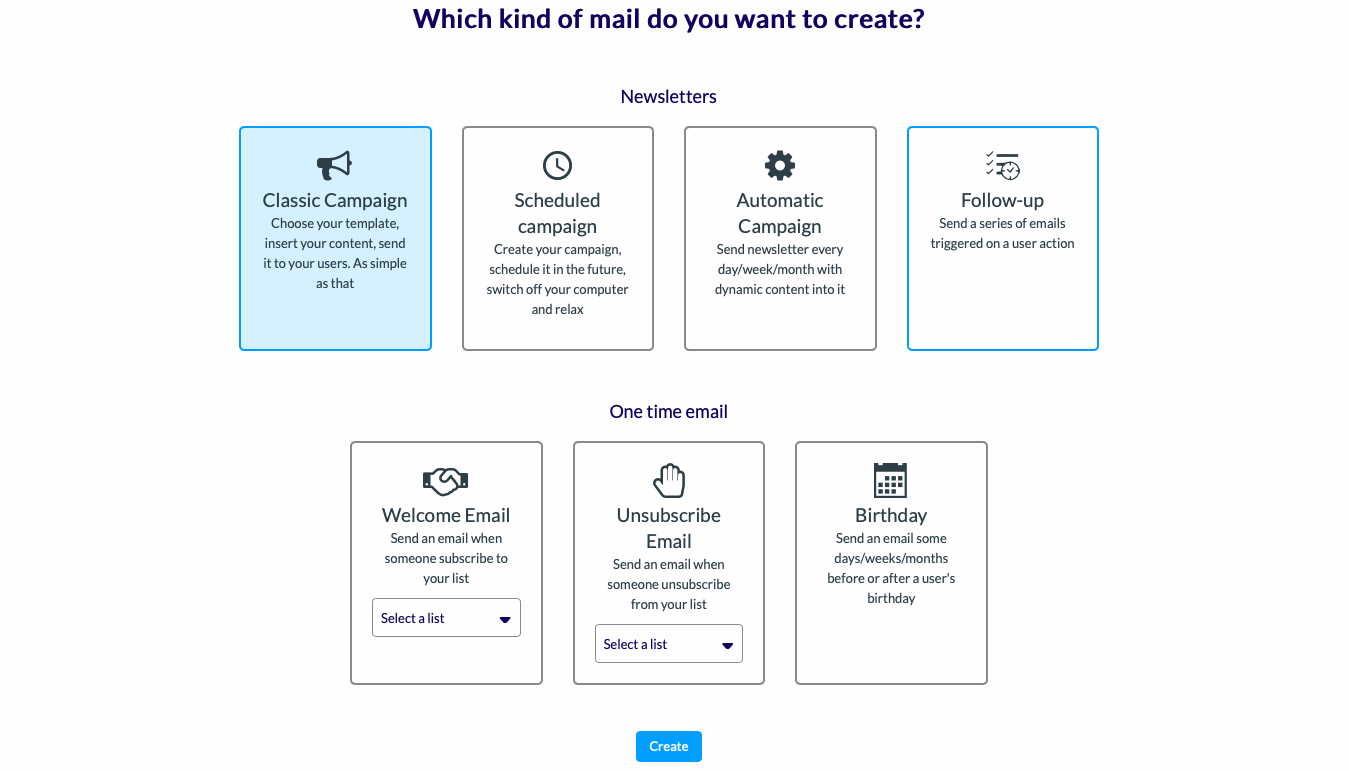
You will have the choice between several types of campaign:
- The classic campaign
This type of campaign allows you to send basic newsletters.
- The scheduled campaign
This type of campaign allows you to schedule the sending of a campaign in advance. You won’t have to worry about forgetting to send your newsletters.
- The automatic campaign
This type of campaign allows you to automate the sending of newsletters on specific dates (every day/week/month).
This type of campaign allows you to send newsletters in relation to the behaviour or actions of a user. Here is an ultimate guide to follow-up emails.
You can also create specific emails: welcome email, unsubscribe email and birthday email.
To start, we will create a classic newsletter. Click on “Create”.
You can then decide to create your newsletter from an empty template or from a template already created. To access more templates, go to the “Templates” section and click on “See our template packs”.
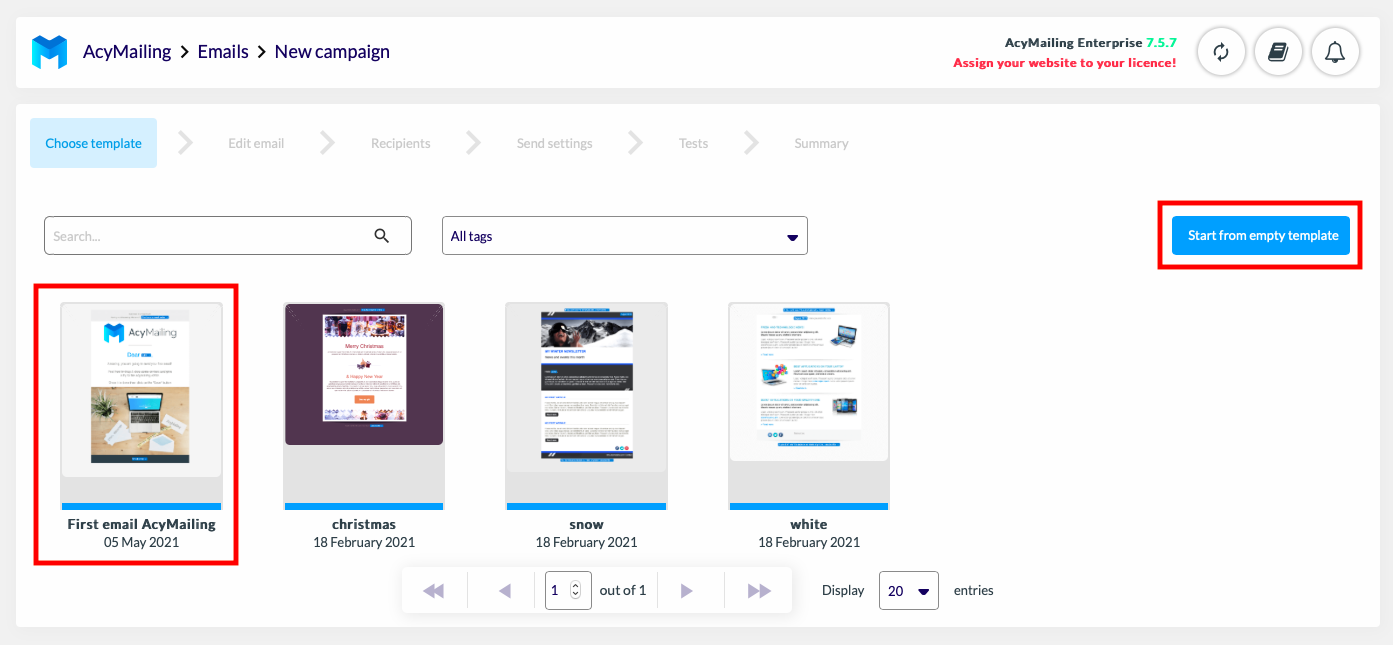
Select your template or empty template and let’s start editing your first newsletter.
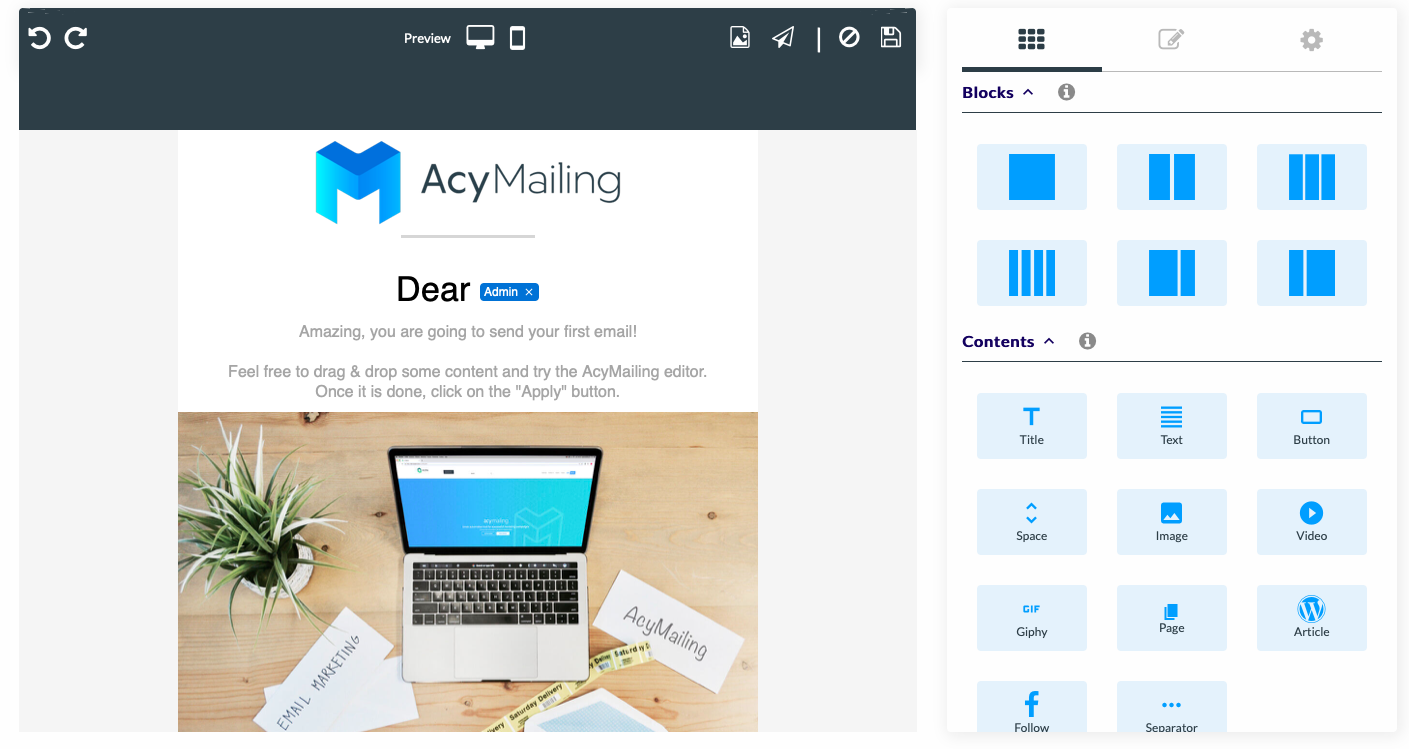
You will go into the editing mode of your newsletter. To insert content, simply drag and drop the item onto the email. You can insert different types of content in your newsletter:
- Images, videos and GIFs
- WordPress articles
- Dynamic content and text
- Pages
The right-hand menu is composed as follows:
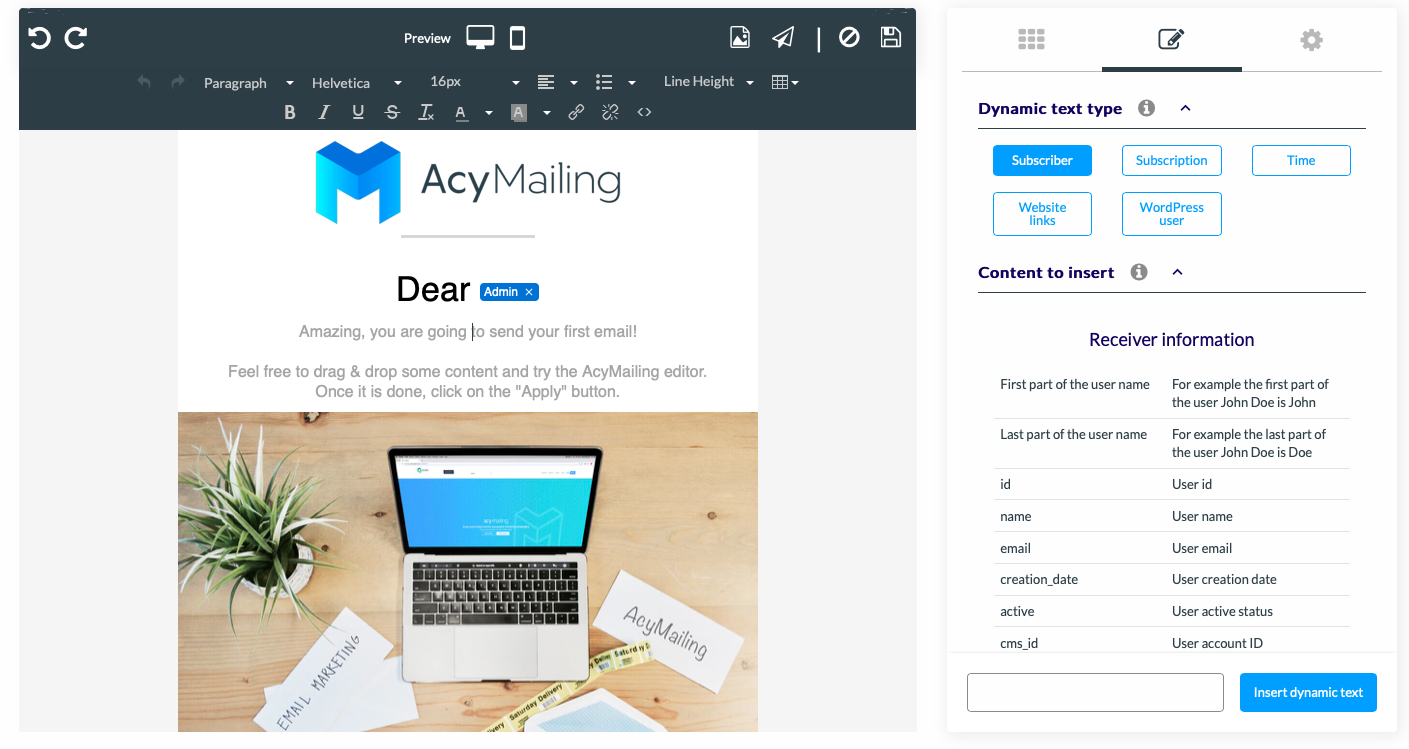
- 1st tab: Available content and blocks.
- 2nd tab: Dynamic content (select an area of your newsletter to make it appear)
- 3rd tab: Template design, fonts and social network icons.
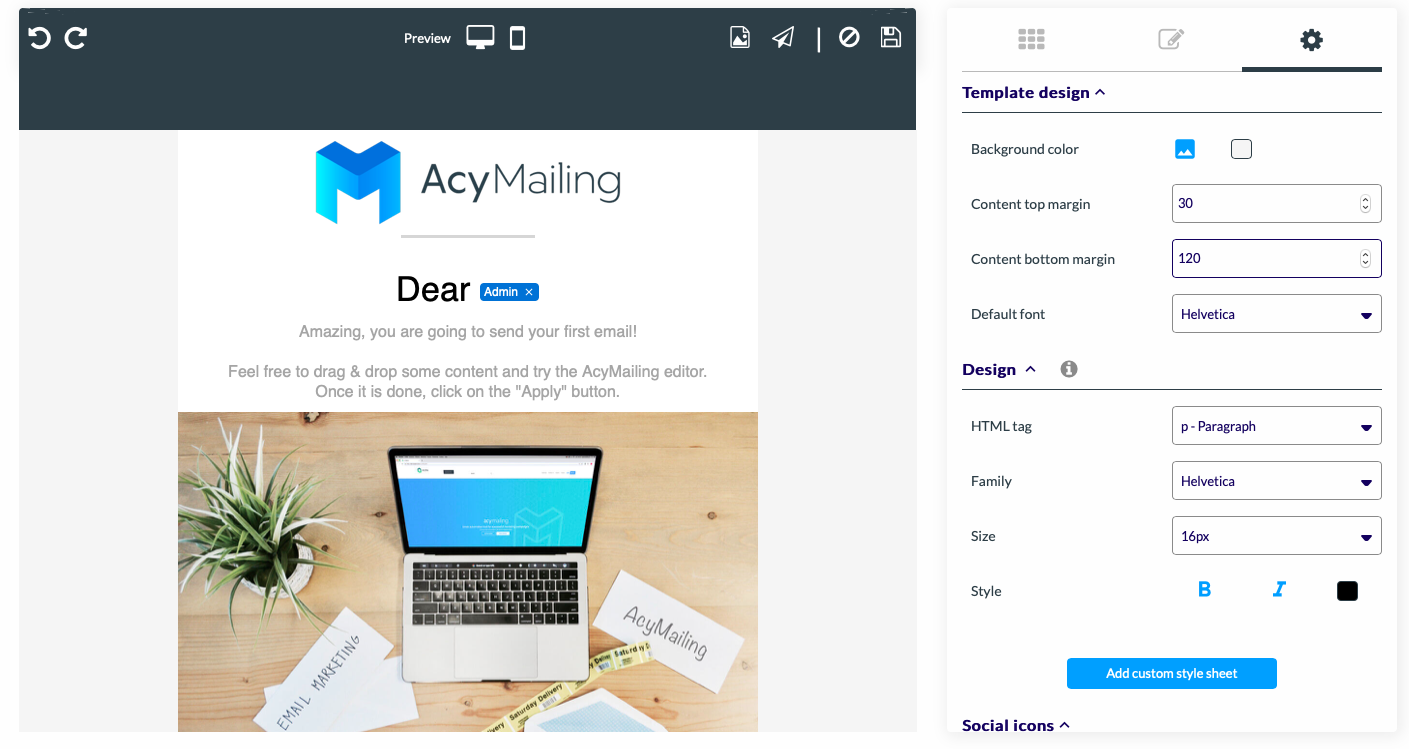
All you have to do is write and insert content into your newsletter. Once your newsletter is ready, you can save it.
Then fill in the information about your e-mail: campaign name, e-mail subject, preview line, etc. You can also add attachments.
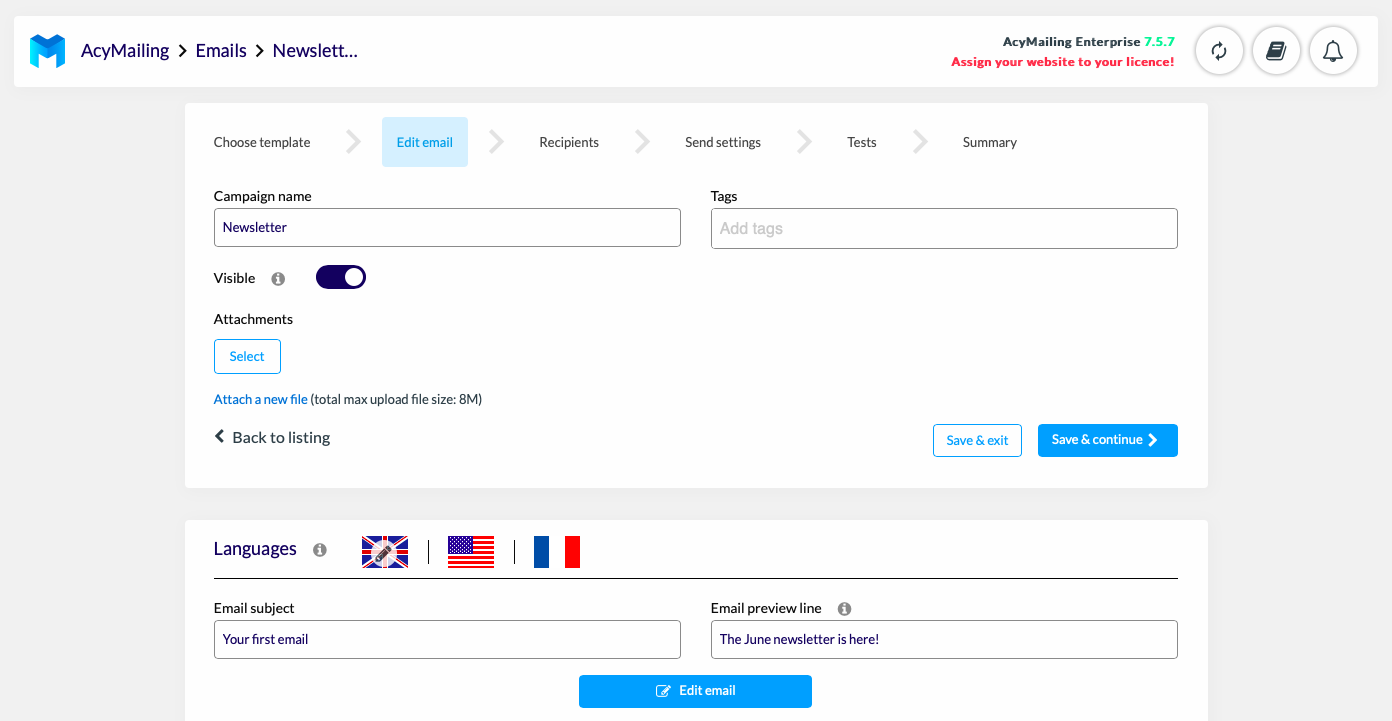
Then click on “Save and continue”.
Step 7: Send your first newsletter using AcyMailing
You must define the recipients of your newsletter before sending it. In the “Recipients” tab, select one or more of your lists to receive this newsletter. You can then click on “Save and continue”.
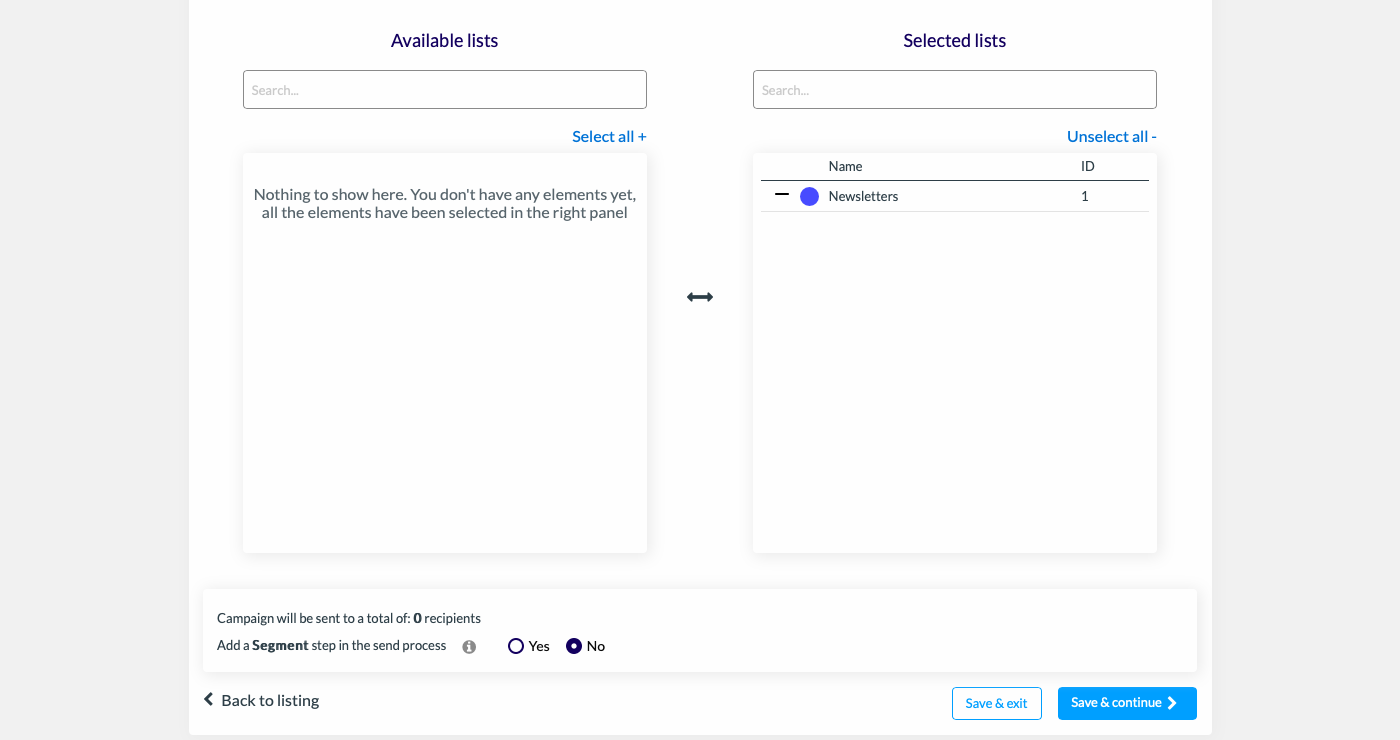
You can add a segment to your lists.
If you want to use a segment, a new tab “Segment” will appear.
Save and continue.
In addition, you can choose an existing segment or create a new one. You can also go to the “Segment” section and then “Create” to create new ones.
Segments can be created based on several filters:
- AcyMailing fields
- Site user account field
- AcyMailing lists
- Statistics
- Unconfirmed user
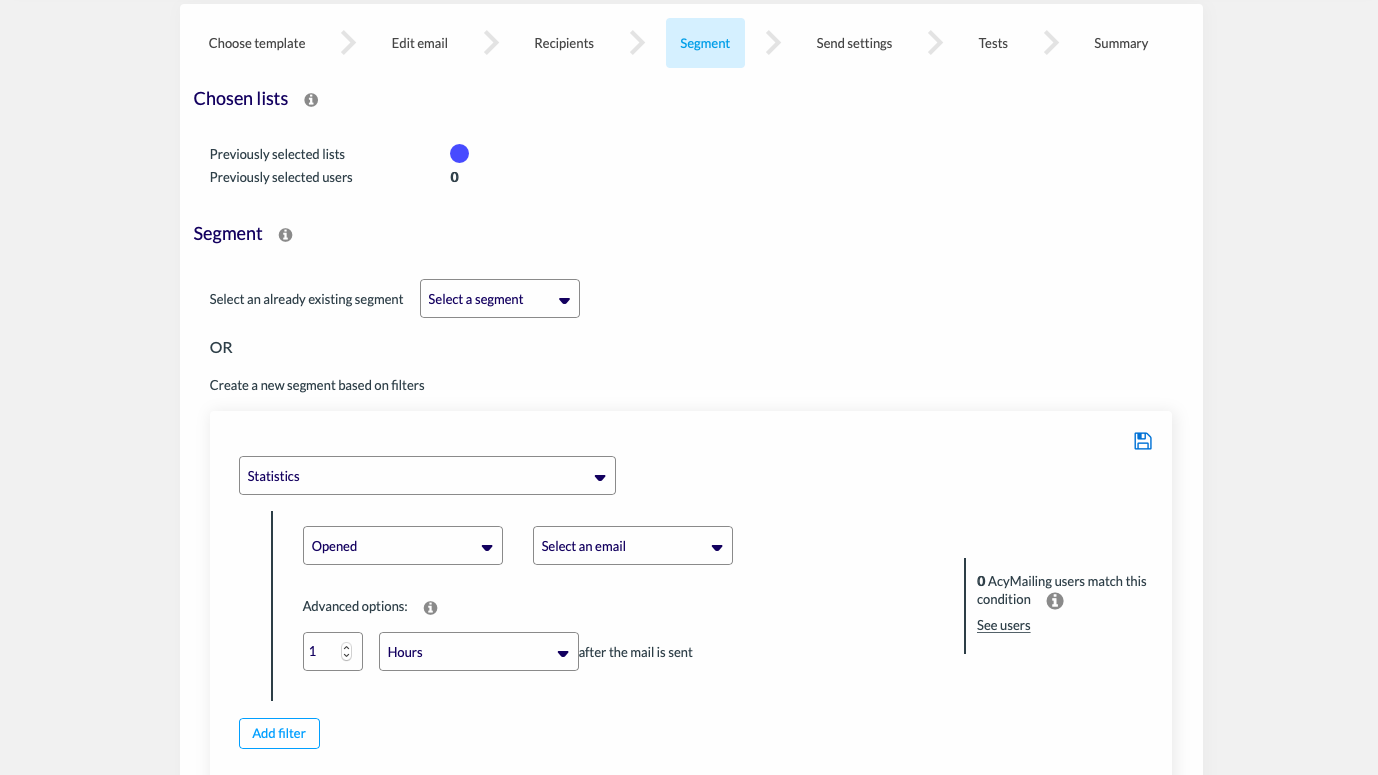
Segmentation allows you to send a newsletter only to selected people for a targeted campaign.
Once you have selected your segments, you can save and continue.
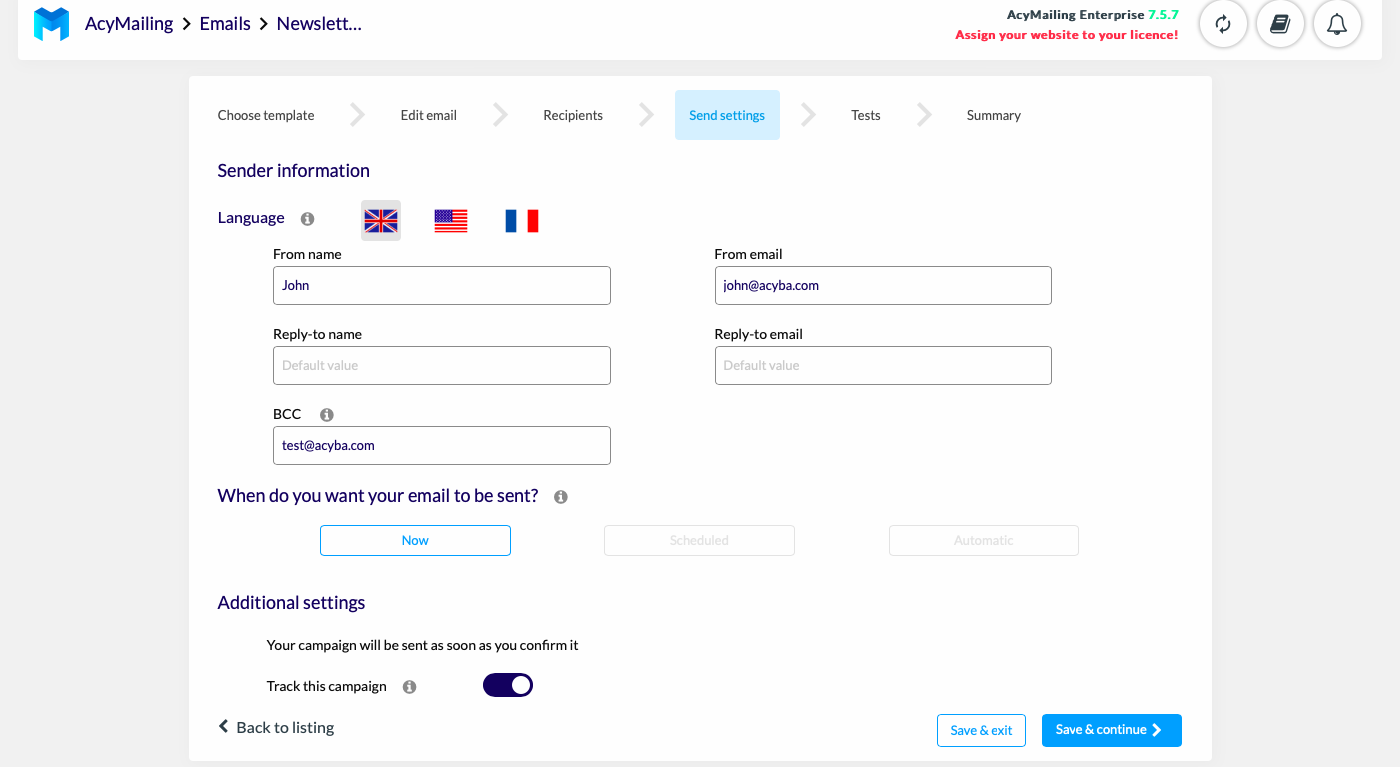
Under “Send settings,” you can specify the settings for your email. Fill in the sender’s information (language, name, email address), choose when to send it, and make any other settings you wish.
Then test your campaign. First, you can send your email to yourself or to a colleague to see how the email will appear in real time. If you are happy with your email, now perform the security check. This test allows you to evaluate the deliverability and security of your email. The test will analyse the security of the content, the links and give a SPAM test (>80). Click on “Spam Test”.
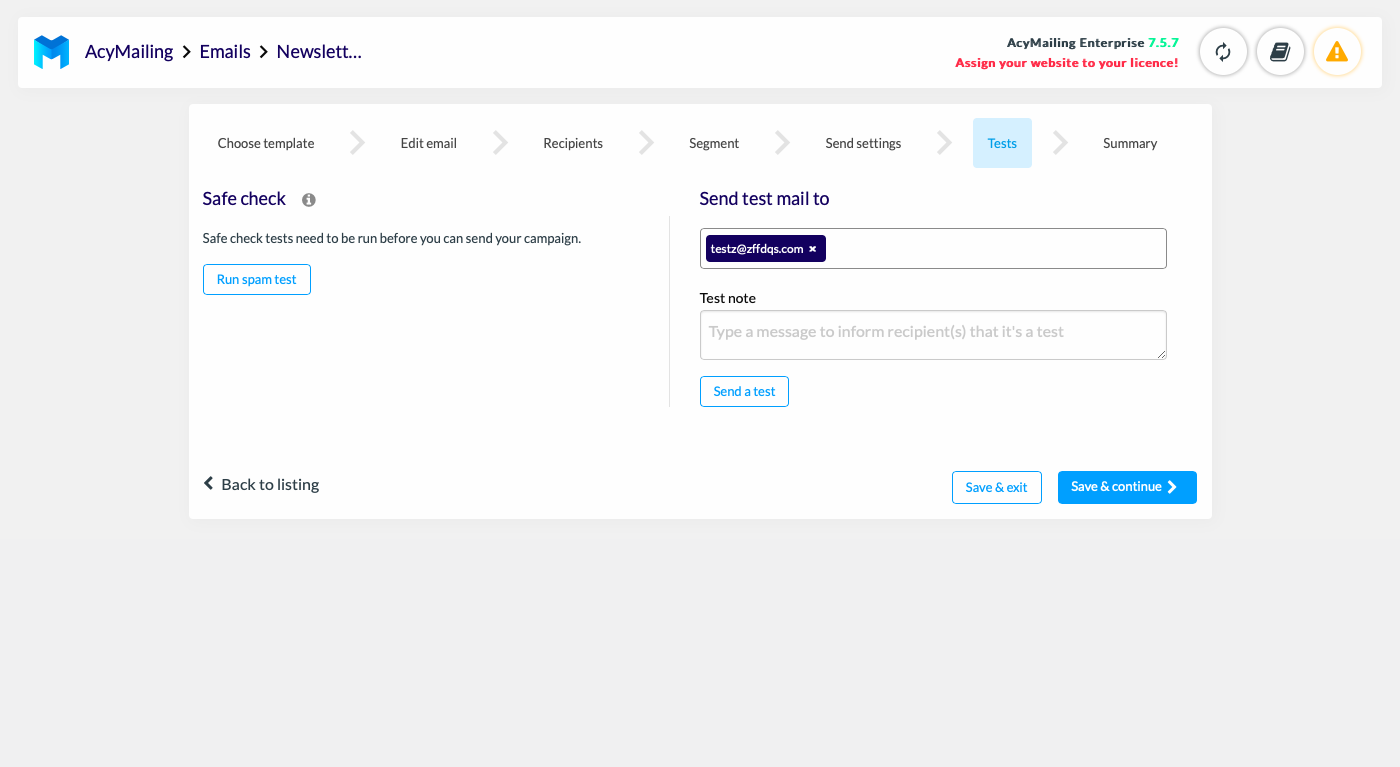
If all the checks are green, you can save and continue.
Finally, make the last checks of your email in “Summary”.
Your email is ready to be sent.
Step 8: Analyse your statistics
After sending your newsletters, you can view the statistics of your campaigns in two ways. To see the overall statistics, go to “Statistics“. Several data can be viewed:
- Percentage of emails well sent
- Opening rate
- Click rate
- Bounce rate
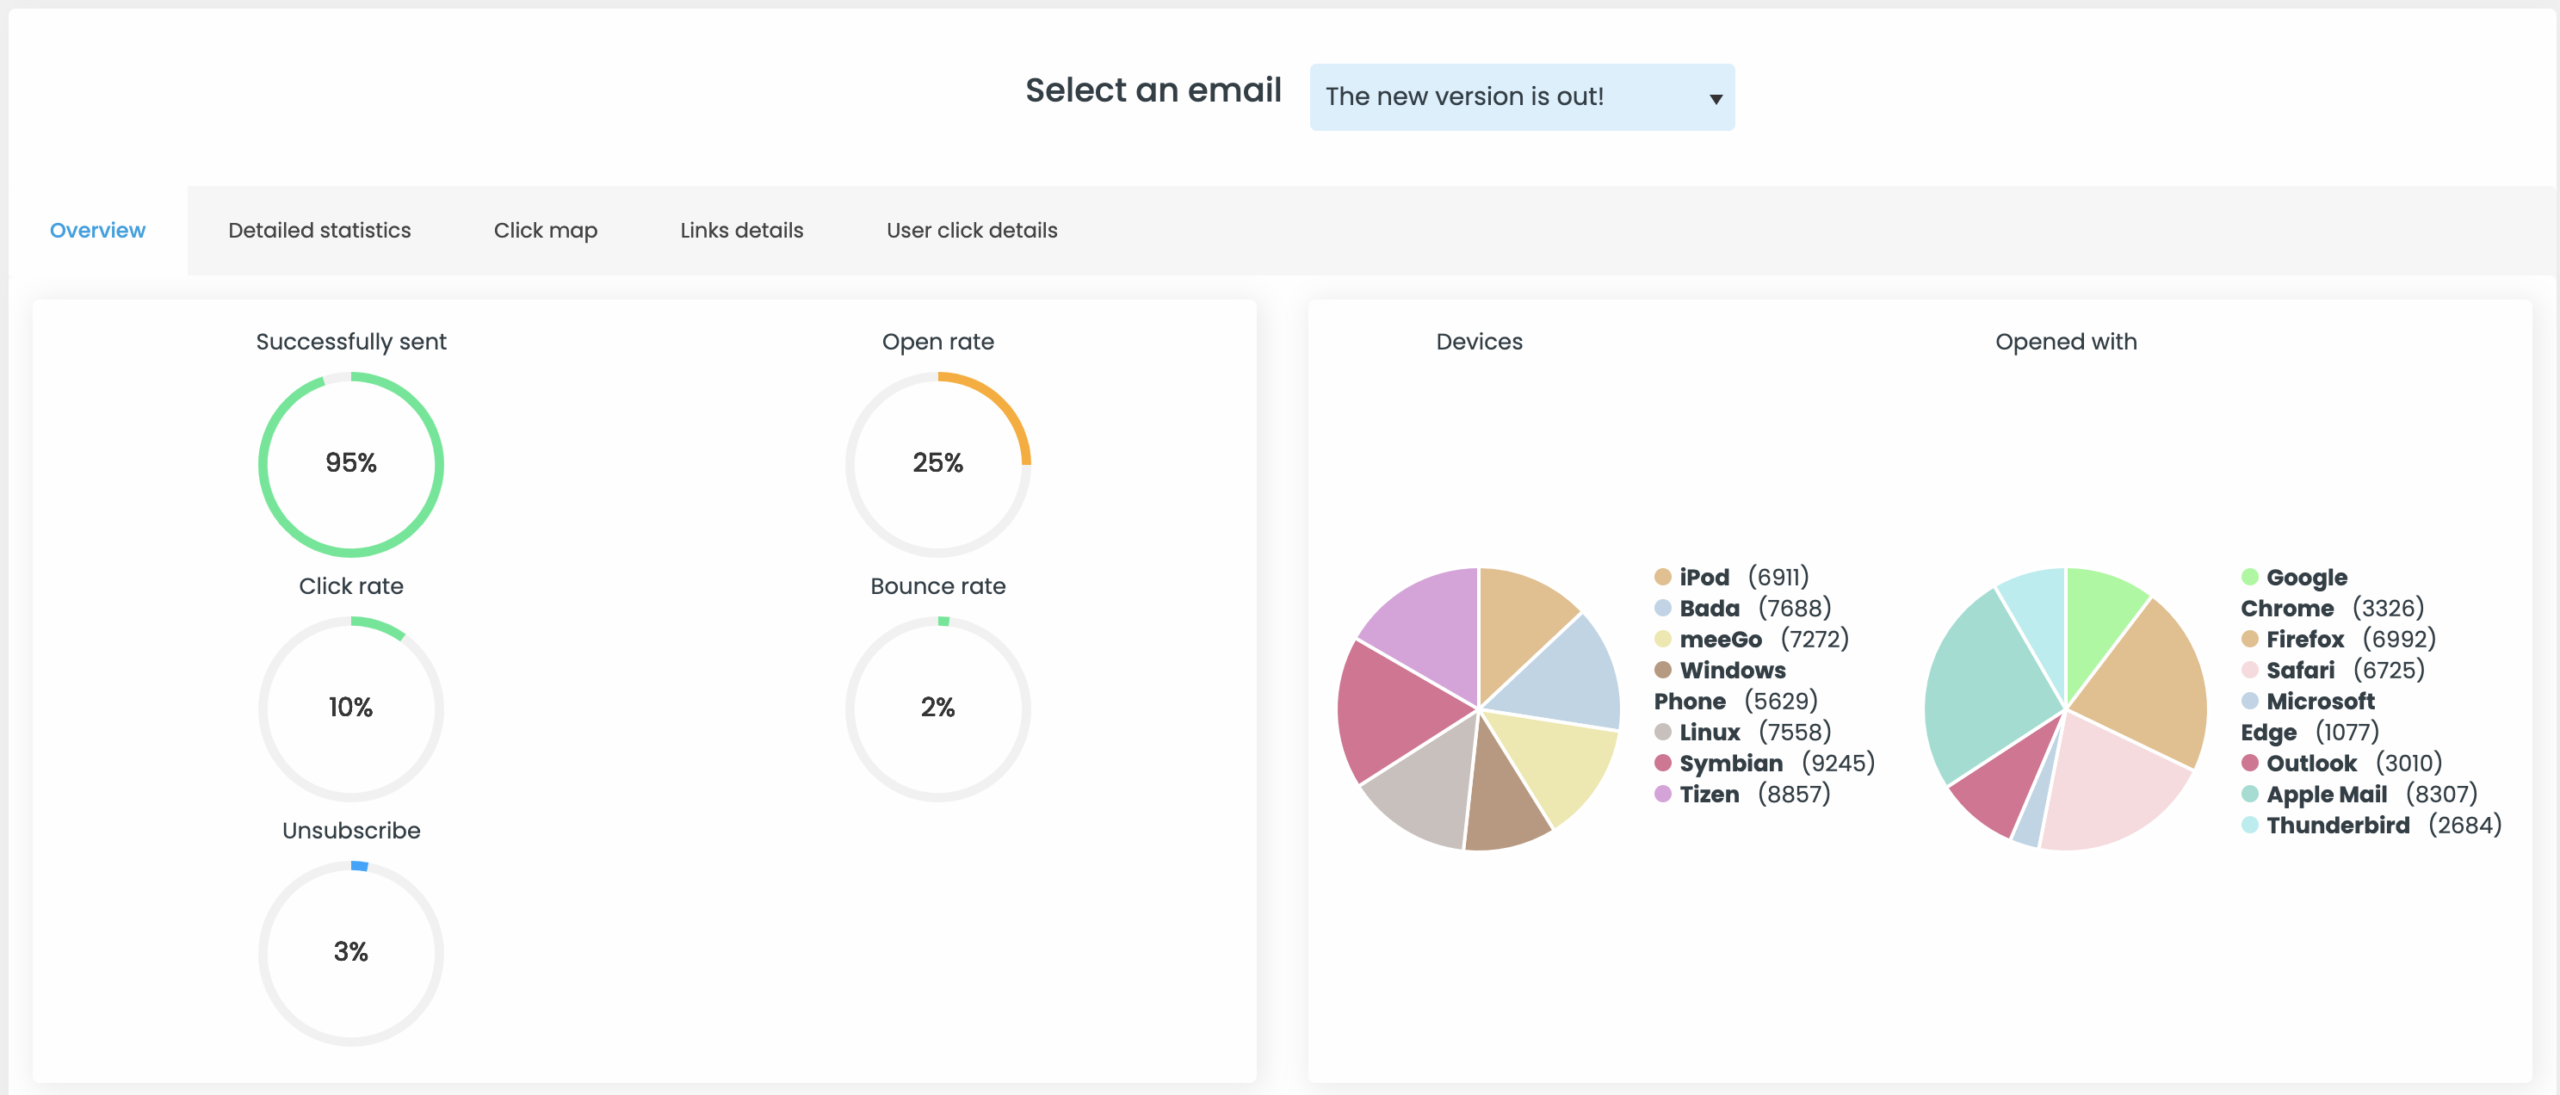
Detailed statistics for each email are also available (“Detailed statistics”).
Your email campaigns’ statistics can be viewed under “Emails”. You can view the statistics of each campaign: click rate, open rate… If you want to know more about statistics, check this article how to improve your opening rate.
You now know how to use the best newsletter plugin on WordPress.
We hope you found our guide useful. So you’re going to become a pro soon?